
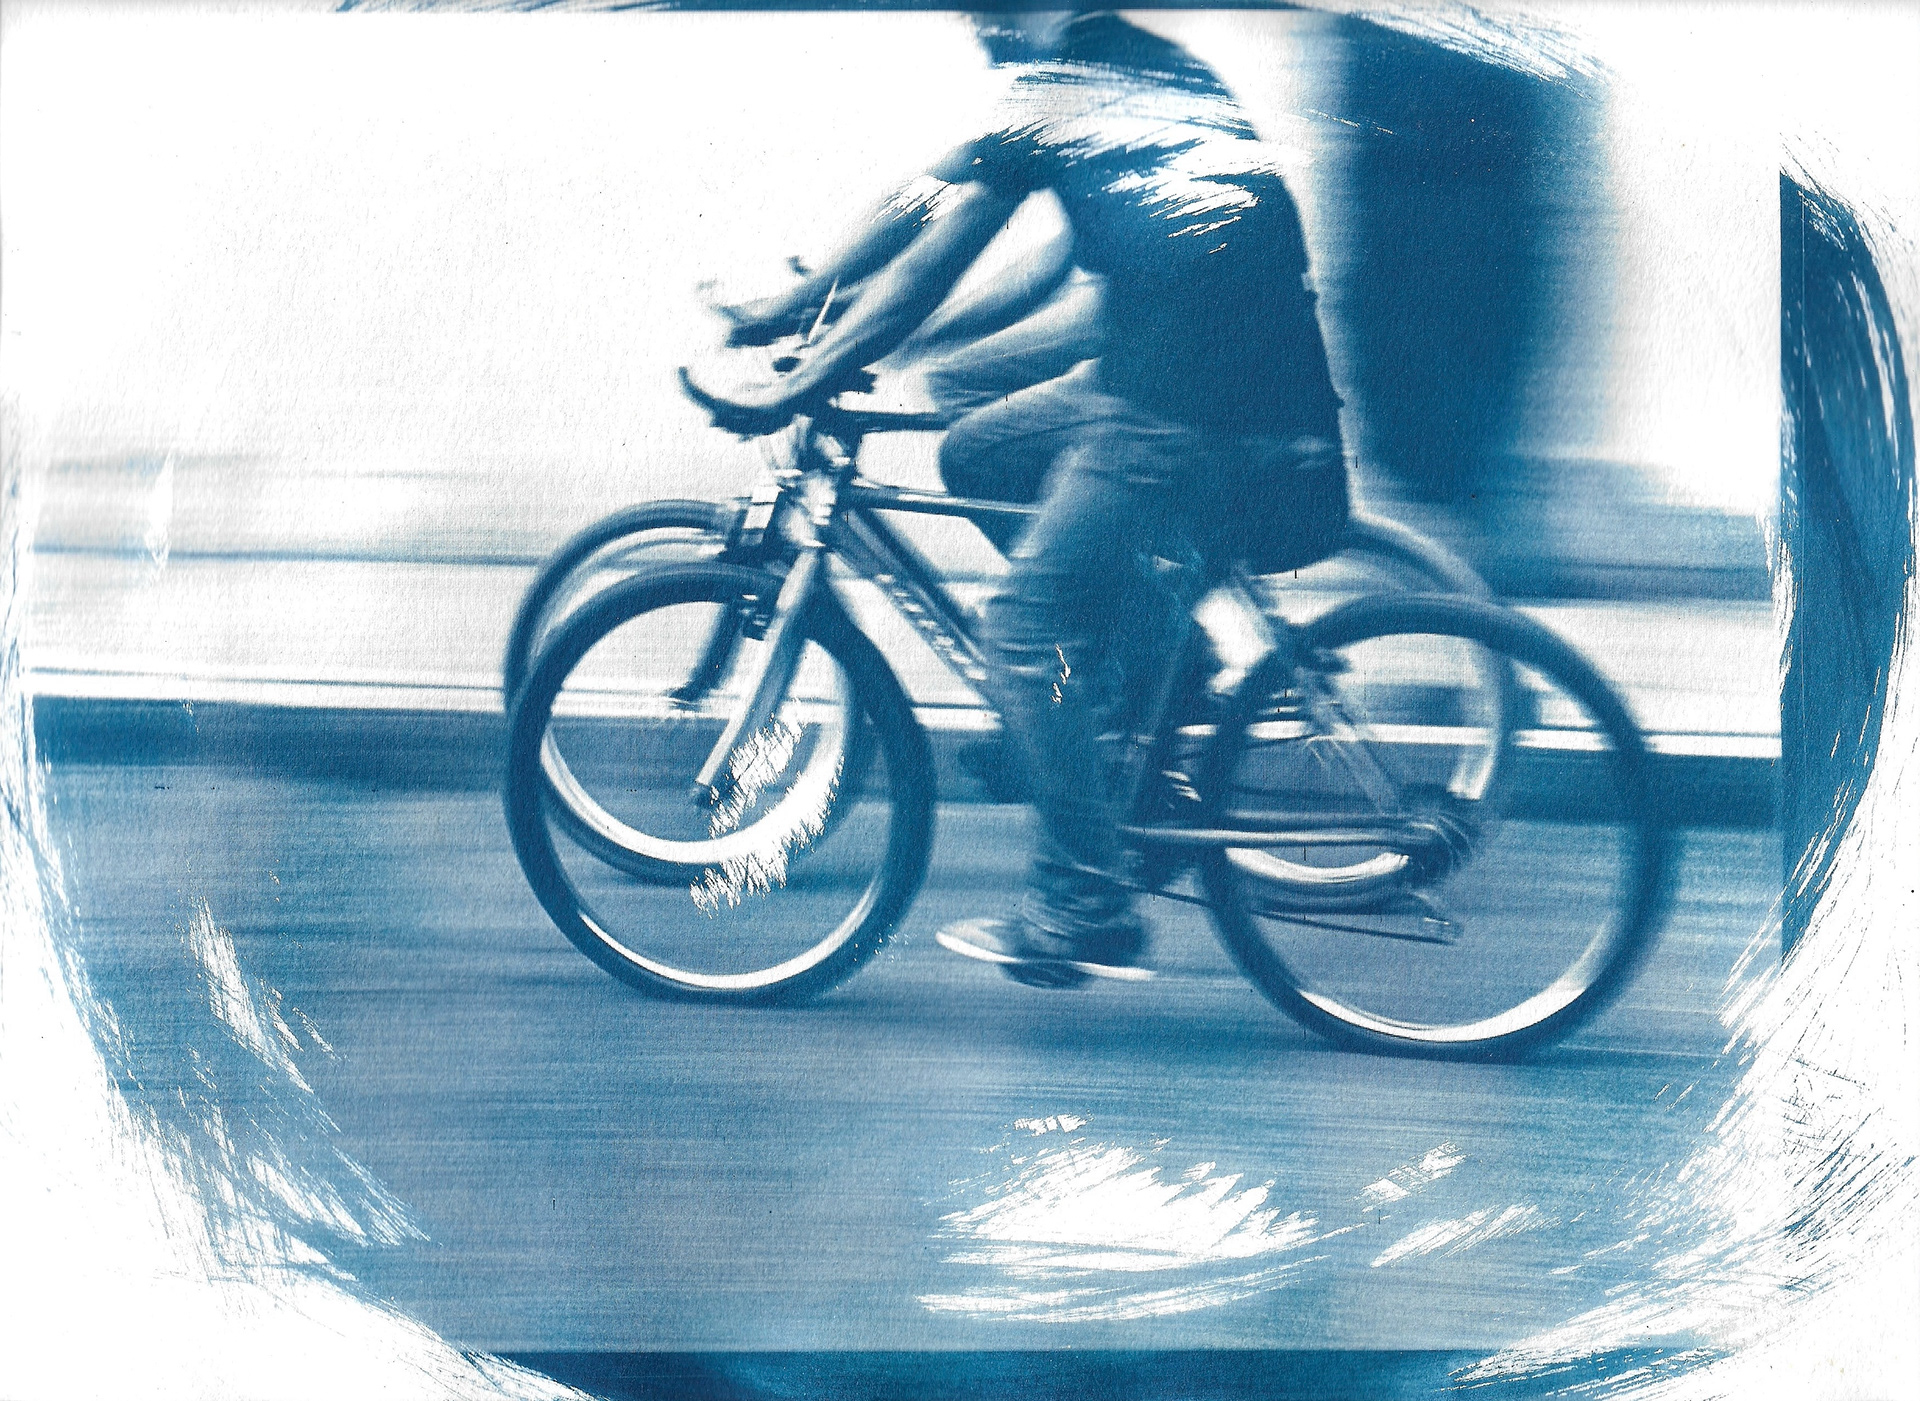
Title: Bicicleteros en Cholula. Year: 2017 © 2024 all rights reserved
The world of experimental photography offers a variety of techniques, and cyanotype stands out for its unique charm and surprising ease. Invented in 1842 by astronomer Sir John Herschel, cyanotype predates even the iconic daguerreotype process. This alternative printing method bathes your photographs in a beautiful Prussian blue, creating a captivating interplay of light and shadow.
This comprehensive guide will take you from its fascinating origins to developing your very first cyanotype photograph.
A Touch of History: The Birth of Cyanotypes
Sir John Herschel's discovery wasn't intended for photography as we know it today. He was searching for a light-sensitive solution to copy astronomical observations. Yet, the process he stumbled upon held immense creative potential. The simplicity and affordability of cyanotype made it a popular choice for creating blueprints and botanical illustrations. In the late 20th century, the artistic community rediscovered cyanotype, and today it's a cherished technique for photographers and crafters alike. Read my article The History of Cyanotype Photography to learn more in-depth about its fascinating history.
Now let's dive into gathering the materials for your first cyanotype! I curated a list of products that you will need and added a link to where to get them so that you don't have to invest any time doing so. However, I highly recommend going through your pantry and storage to use whatever you already have and fits your needs for this experimental process.
Step-by-Step Guide to Cyanotype Photography
What You'll Need:
• Ultraviolet light source: Sunlight works well, but a UV lamp offers more control.
• Amber Jars with droppers (optional for solution storage)
• Negative (digital or transparency film)
• Glass sheet protector (for digital negatives)
• Large container with running cold water
• Notebook (documentation of your process)
Now that you have gathered all the materials that you will need to start dabbling into this experimental journey with cyanotype, follow Steps 1 to 5, and let's create together your first cyanotype!
Step 1: Preparing Your Light-Sensitive Solution
Dim the lights: Both ferric ammonium citrate and potassium ferricyanide are sensitive to light.
Mix solutions: In separate amber or ruby red jars, dissolve 25 grams of ferric ammonium citrate (solution A) and 10 grams of potassium ferricyanide (solution B) in 500 ml of distilled water each.
Combine solutions: In a clean container, mix equal parts of solutions A and B. This creates your light-sensitive cyanotype solution.
Step 2: Coating Your Paper
Dim the lights or use a safelight: Work under minimal light to prevent the solution from becoming prematurely exposed.
Brush or swab evenly: Apply a thin, even coat of the cyanotype solution to your paper using a foam brush or cotton swabs. Ensure complete coverage and avoid pooling.
Drying time: Hang the coated paper in a cool, dark place to dry completely. This can take 30 minutes to an hour.
Step 3: Making the Exposure
Prepare your negative: For digital negatives, print them on a transparency sheet. A regular printer might not provide enough contrast; consider adjusting the negative in an image editing software for optimal results.
Arrange the layout: Place your negative (film or transparency) directly on the coated paper, aligning it carefully. Cover the entire piece with a clean sheet of glass to ensure even contact.
Expose to light: Take your setup outdoors on a sunny day or use a UV lamp. Exposure times vary depending on sunlight intensity and the UV lamp's wattage. Start with a short test exposure and adjust accordingly. Typical exposure times range from 5-15 minutes in sunlight to a few minutes under a UV lamp.
Step 4: Developing Your Cyanotype
Darkness is key: Move your exposed cyanotype to a completely dark space.
Rinse thoroughly: Submerge the exposed paper in a large container filled with cold running water for at least 10 minutes. The unexposed areas (highlights) will wash away, revealing the beautiful Prussian blue tones.
Clearing the final touches: Once the highlights are clear, rinse the print in a final bath of clean water to remove any residual chemicals.
Step 5: Drying and Finishing
Gently, gently: Hang the print or lay it flat on a clean, absorbent surface to dry completely. Avoid using heat, as it can damage the print.
And that's it, by now you should have created your first cyanotype (or went through a first attempt of doing so!) I'd love to see your results, you can reach out via social media and share them with me!
And last but not least...
Here are some tips and tricks for success:
Be patient and enjoy the process! Mastering this technique requires a good attitude and lots of experimenting.
Wear clothes to channel your inner artist and that you wouldn't mind staining.
Take notes and document your experimentation, this can be very handy for you to analyze the best exposure times based on your conditions (either natural sunlight or UV light).
Until next time!
Disclaimer: This site contains product affiliate links. We may receive a commission if you make a purchase after clicking on one of these links.
